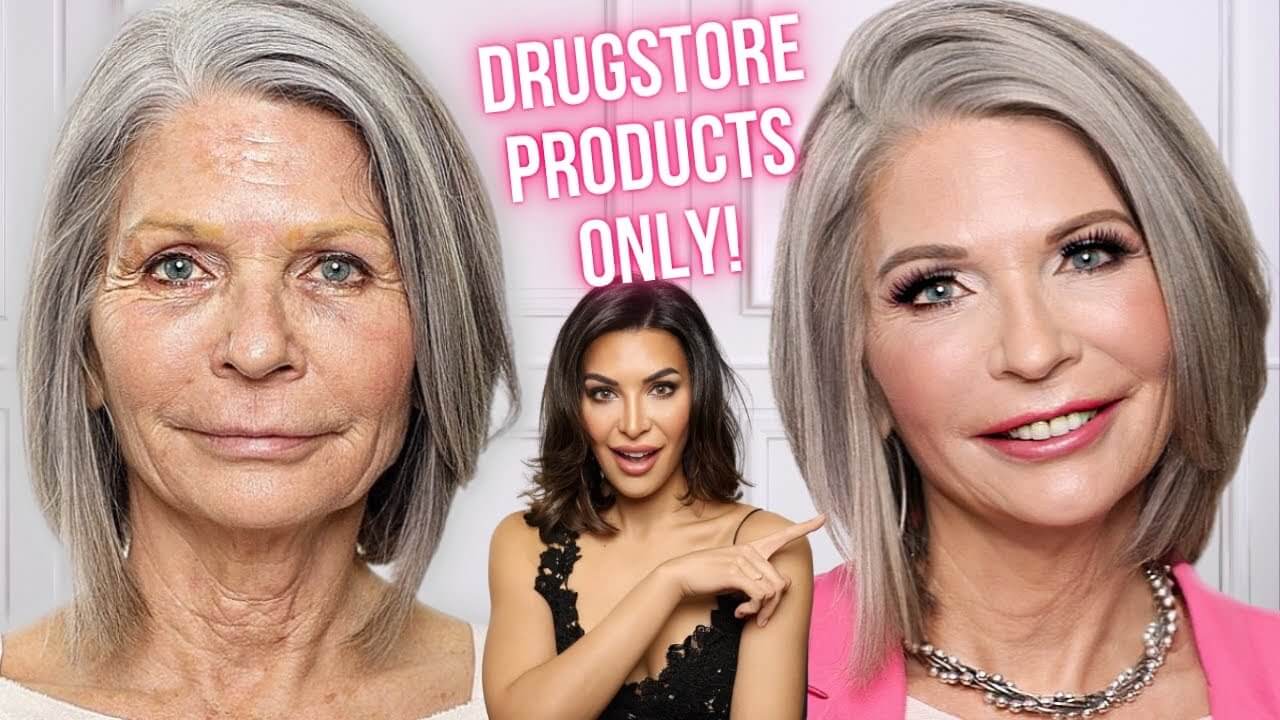
Meet Francine. Francine is in her mid-sixties. She has a gorgeous head of natural salt and pepper hair, beautiful, icy blue eyes and incredible cheekbones. But she feels like she's in a little bit of a Who can relate? I guess the real question should be who can't relate? We're all in the makeup rut right now. This is how Francine does her own makeup. This is how she looks with no makeup on at all. And this is a look that I designed for her using only inexpensive drugstore products. Highly requested. Today, I'm going to go through a detailed tutorial showing you what colors I use on her, what products I chose for her.
But most importantly, why I made those choices. I am certain and hopeful that you'll find some little nuggets of information that you can then use to help yourself feel better. So the first thing I need to mention is that Francine's biggest insecurity, the thing that drives horror absolutely crazy. We all have something, we all have something, right? For her, it's her brows. She's had a really long history with her brows. We are going to address her brows a little bit later, but I just wanted to mention it in case it's something that you guys have noticed, something that's going to be changing a lot in this video.
We're going to talk about it, but we're going to start by doing some of the makeup application first, and we'll address that later. So the first thing we want to do in our makeup application, of course, is start with a completely cleansed skin and then go in with our regular skin care. You want to give your skin care maybe 5 minutes to fully absorb and plump up the skin before you put any other products on it. Now, let's talk about Primer. So many people ask me about primers. What primers? I like If I recommend primers, I like primers. I think that they can be very useful. Do I use them all the time? No, but they do have a time and place. One of the reasons that a primer is great is because it can create like a grippy feeling on the skin, which makes the makeup last longer.
It can also be really great for filling in large pores and even blurring out and filling in some wrinkles before you put any foundation products on. So most of these products, because I wanted to keep them extremely inexpensive for you. Most of them are from e.l.f. E.l.f. did not sponsor this video. This is not a sponsored video. I love this brand. And the reason I love it is because I find they have some really innovative, very high quality, excellent products for an incredibly inexpensive price. For her primer today, I went in with the The reason that I chose this one is because it's great for filling in larger pore areas. For Francine, She shared with me that she has combination skin because she has combination skin. She's got oil in the T-Zone area. And so because of that, the pores are naturally a little bit larger in that area. I didn't use this product on her entire face. I just focused it on her forehead, her nose and her chin where the pores are a little bit bigger. Now, because I am a Radiance girl, I feel like it is incredibly important when working with mature models to give them a lot of radiance in their skin.
It really is a thing that helps them look so much more youthful. I also went in with the e.l.f. So this one is for hydration. This one's more for minimizing the look of pores. I use this on the cheekbone area. You don't have to get two primers if you don't want to. You can definitely, if you struggle with pores, just get the Poreless Primer and put it in the zones that you need it. Because I wanted a lot of radiance in the cheek and I wanted more of a poreless finish in the center of the face. I combine them both. Now the next step is to do the eyes. I always like doing eyes first, In order to work on the eyes, we have to prime the lids. The way that I prime lids for almost every client and for myself is just by using a concealer and a powder. I find that it works really, really well. You kind of want a base, right? You want something in between the oily eyelid skin and the shadow.
If you don't have something in between that oil from the eyelid skin is going to corrode the shadow and definitely make it crease and make it not as long lasting. So when we do that, we want to apply our concealer from lash line all the way up to brow bone. We want to make sure it's totally smooth and uncreased, and then we want to set it with a setting powder for her eyes. I went in with this eyeshadow palette. So this is the Again, it's super, super affordable. This is a $10 palette and you are getting so many different colors. Now, the reason that I chose this palette over all the other palette is because these are cool tones. Purple is a cool tone. Pink is a cool tone. All of these are cool toned and we have some high shine shadows and we have some matte shadows, which are really important when we're building up a look. Francine has icy blue eyes, cool tone. And she also has natural silver, gray hair, which is very cool toned.
So I wanted to keep the look harmonious. If you have features like Francine, you have cool toned features. If you use cool toned shadows, it's a much easier way to get it to look balanced and beautiful. You don't have to, like, fight with things as much. I, for example, am the complete opposite. I have very warm toned hair. I have extremely warm toned skin. So an eyeshadow palette like this on me wouldn't look as good.
It just wouldn't look as balanced as easily. I would have to like, add different elements here and there to balance out the shade. But if you want, like a foolproof way to look really beautiful, If you're cool, choose cool shadows if you're warm. Choose warm shadows. The first step of every eyeshadow look should be incorporating a transition shade with a fluffy crease brush.
This is going to marry everything together seamlessly at the end. So again, using a fluffy crease brush, I dipped into the shadow, topped off the access, and then I buffed it into the crease, moving and windshield wiper motions, carving out that distinction between the eyelid and the crease. Now, the next shadow that I used was this vanilla color. So this is a matte, very light tone, and I place this color on the inside of the eye. Now, the reason that I did this is because Francine has depth in here. And so I wanted to pop that forward because it's a very youthful, bright, awake look.
So the way that we do that is with highlight contour techniques, because she has depth, I'm popping it forward. Now that we worked with two matte shadows. I wanted to add luminosity to her lid. The way that I added luminosity to her lid as I dipped into this light pink. The second one. This is a shadow with a lot of sheen, it doesn't have glitter, it has sheen light reflecting properties. A lot of women in this age group are very scared of using any type of shadow with light reflecting properties, and I always say that that is a big misconception that we have in society in the makeup theory that you should in shadows like this, still look absolutely beautiful on women who are over the age of 60, 70, whatever. You just want to make sure that you're placing them in the right spots. So the way that I like placing the shadow is by dabbing it right in the center of the lid. So we don't want to go too far out because we have a lot of movement here and we'll get it into the crow's feet and kind of highlight or illuminate them.
But if you keep it right in the center of the lid, you're casting light right there and it's actually going to open up the eyes beautifully. As a last step of the shadow application, what I did is I dipped into the darkest tone that is in this palette, which is a really nice deep plum. And I used a tiny little crease brush, and then I ran it along the lash line, kind of flicking up in the corners. from the lash line to the crease and this little tiny kind of sideways triangle area here on the sides looks really, really pretty. You can do this with any color family, right? You want to use kind of that light in the lid, the highlight your transition color and then the tiniest bit of smoke on the outside of the eye. After that, I went in with my eyeliner. Now I'm stoked to show you guys this. This is the e.l.f.
No Budge The reason that I love this liner is because it is a dark gray. It is a charcoal gray. It is not black, it is not brown. Black for Francine would have been very harsh. She could have pulled it off, but it would have been harsh. And I really wanted something very fresh, very soft for her. Brown would have been too warm. Because she is so cool. And every aspect, the hair, the eyes, everything. So that's why I went in with a dark gray. A dark gray is an awesome liner color for anyone with natural salt and pepper hair. It will give you loads of definition without the starkness of the black or without the warmth of the brown. After that was all done, I just cleaned up the fallout that we got from that shadow under the eyes with a pointed Q-Tip dipped in moisturizer. Now I wanted to start working on the skin. Now here is a product that is very interesting. Now, this product has gotten a lot of attention online, and the reason that it did is because it is a direct dupe for the Charlotte Tilbury one.
But at a fraction of the price, I'm going to be honest, I'm going to have an honest moment. When I bought this for her, I thought it was a liquid foundation and I was using it on her as a liquid foundation. And then it's only after I filmed this that I realized that this actually isn't a liquid foundation. I don't know how I missed the viral wave, but I did. It was fine in the end because I managed to make it work.
But I just want to kind of show you what this is. So this comes with a doe foot applicator, which is very, very cool. But it has an extremely light reflecting formulation. So what this is, it's actually a hybrid between skincare and makeup. So it is tinted, but it's more like a highlighting primer that you can use a few different ways. So you can use this under your foundation. If you want to just give yourself that luminosity. You can also use this by mixing it. You can use this on top of your foundation as a spot highlighter, so you can put your whole foundation on. Then you can use it on the cheekbone if you want, maybe on the very tip of the nose or the bridge of the nose as a spot highlighter, or of course, you can use it completely on its own. Now, the interesting thing about this is that it has a sheer coverage and it's very luminous, but it's absolutely beautiful. When I first put this on her, I thought, my goodness, this is very, very luminous.
It reminded me a little bit of the IT cosmetics CC cream, which is super beloved in this age demographic, but I found that I wasn't getting a ton of coverage with it. If you are the type of woman that wants a beautiful, luminous, healthy, radiant finish to the skin, but you don't want to feel covered up with foundation, this is a great thing to use on its own, but if you are the type of person that wants more coverage, you are going to want to mix this or use it under your foundation. When I got the Halo Glow on her entire skin, I was able to step back and see what needed more coverage and I was able to spot correct and build up the coverage that way. So it's kind of funny because I went in thinking this was going to be a fuller coverage liquid foundation.
For whatever reason, I just totally messed that up. But when I started building it up, I was able to get the coverage that I needed from this while using this, but keeping the products on the skin minimal, which is really great. When you have skin that has more wrinkles, more mature skin thinner skin, trying to keep the products sheer makes for a much more comfortable wear for the person, for the client, for yourself. It was a mistake, I'm going to be honest.
But in the end, and you'll see in the end how it turned out, it ended up kind of being like a pleasant mistake, like a pleasant surprise. When I worked under Francine's eye, I really kept this very focused on the depth here. Like I said, she had a little bit of depth up in here and a little bit of depth down here in the tear ducts. So I took that brightening concealer and I really focused it here and I didn't put it here. This area of the skin as we get older has a ton of movement. So with movement comes a lot of creasing. With creasing means we need to offset with powder. When you add too much powder, you get creepiness, right? So we want to really avoid putting concealer in foundation in places where you're going to go down the slippery slope of like this makes this, this turns it to this, this makes do you know what I'm saying? So just place the products where you need them. In this case, I place the concealer Now, because I noticed that this wasn't giving me coverage.
I then went in with this and I also worked around the nose areas that needed a smidge more color. And I apply this to the forehead a little bit later as well to kind of build that up. So I built up the coverage on the center of the face with concealer, but kept the luminosity and the sheerness of the finish with this product. Pretty cool, right? It's funny how sometimes your mistakes can turn into the things that you're going to repeat later. I really think I'm going to use this combination again on my mature clients. I really think they're going to love the wear of this. I know she felt really, really beautiful, but it didn't go on intentionally.
It's funny because when I was thinking about this video, I was going to I was conceptualizing how I was going to talk about this and give tips on this. And then I just thought, you know what? Let's call a horse a horse like, let's cut the B.S. and let's just be real. And that is what happens there. That's how it went down. And you know what? The end result was great. So the makeup gods are on my side today. Now, after the under eyes are completely done, we can work underneath the eyes. Now, I wanted to smoke out under her eyes a little bit, but I didn't want it to be as dark as that shadow color that we put on the outside here. So I went in with that shadow color's lighter neighbor. Okay, so we did this on the top lid. I just went down one so that we're still deep, but not so aggressively deep. But in that same again, cool color family and I smoked that out with a nice dense little blender brush right under the lash line that really, really made her eyes pop so beautifully.
Now let's tackle the brows. The brows are a big thing here, so I'm going to let Francine tell you guys what went down with her brows and why she's in this brow evolution right now. So what Francine has been using for her brows is a brow stencil. You can get these by Anastasia Beverly Hills. I have used them in the past, but I've never used them totally successfully, to be honest. And the reason is because they are standard. But brows are very much based on your individual features, so where they start really depends on your facial structure. Where they peak really depends on your facial structure, and where they end really depends on your face. If you have a bigger face, a smaller face, a skinnier face, or, you know, a fuller face, all of that is dependent for the brow. So when I look at the brow, there is this theory, right, that when you go from your nose up your brow, your brow should start around there.
When you go from your nose to your pupil, that's where your brow should peak. And when you go from your nose to the end of your eye, that's where your brow should roughly end. So sometimes when we're working with stencils, even if we line them up, that stencil may be too big for the size of our face or that stencil may be too small for the size of our face or our eyes are set differently apart. So using a stencil when putting in your brows can sometimes create a really It can be like this really easy solution that people want to grasp on to, but it can look unbalanced. Instead of doing that today I took again the e.l.f. pencil. I promise. This isn't sponsored by e.l.f., but again, really affordable products for you. And I use the color neutral brown. And what I did is I sketched out my shape. So I always start by sketching from the bottom and creating that nice soft shape that I want. And then if the client really doesn't have any brows, I'll sketch that top section and I'll create kind of a heavier or a more defined area from here all the way down to the tails.
And then at the front. We need to be careful not to create too much of a starkness there, or it can make the person look very angry, almost like an angry bird. Okay, I can give you like an angry bird vibe if you have too much definition on the inner part of the brow. So when I got to the inner part of the brow for her, I just tilted my pen and I started sketching up tiny little hairs to create a diffusion on the inside that then met a more pronounced line from the outer third of the brow. All right. Not to spend too much time here. I also want to talk a little bit about why I chose this color. So Francine has gray hair, but through her hair she still has some of this neutral brown tone. It almost looks like a low light running through her hair. So I wanted to bring that into her face to give her a little bit of warmth. I was worried that if I took her brows too, too cool, it would be a little bit aging or it would wash her out.
So I added, It's not a taupe, it's a neutral brown. Just to give her face a little bit more color, gives a little bit more warmth to balance things out. Now, in hindsight, looking at the footage, I have it right here with me. If I could redo this, I think I would try going in with the cool brown instead of the neutral brown. They didn't have that in stock at the drugstore when I went in, so I thought neutral Brown would be just fine. And she does have that color running through her hair. But when I look at it, you know, completely finished, I think if we just cooled it down a smidge more, like a one tone more, it would have been even better, even more balanced. So this is a personal preference thing. You can always choose a brow color that you think is going to best suit you. You just don't want them to be too aggressive. Okay, That's the key thing. You want them to be soft, wispy at the front, more defined on the tails, but they shouldn't be the first thing you notice when you look at someone's makeup application.
If they are the first thing you notice, they're just too strong. Moving right along. For her blush, I used the and it's in the color Cream blushes, liquid blushes, are amazing for women over 50, over 60. It gives you the vibe that you are glowing from the inside out. It's absolutely gorgeous. I almost always 99% of the time will reach for a cream or some type of liquid blush when working on a mature face. If you are over the age of 50 or 60 and you've never tried it, definitely try it. You may be very pleasantly surprised with how gorgeous your skin looks when you add more of these liquid luminizing products to it.
Now, for a lip liner. For her lips, I used the And for her lipstick, I used #129. Again that's going to be listed in the description box below. Adding a little pop of color with the lips is everything. It makes a huge, huge difference. It really helps the makeup and the person come to life. It really does. She says that she never, ever wears lipstick, and I think this is something that I would encourage her to start wearing because lipstick can make or break a look.
It makes a huge difference. But the most important part of wearing lipstick is balancing the lip shape with the liner. As soon as you get that liner to balance out the lip shape and you can give yourself a poutier, more youthful shape in the mouth, the whole face will change. And you can see that here. You can look at footage of her without her lips on and after with her lips on. What a difference that makes. I also really encourage you to start using punchier colors. They don't have to be super bright, but they need to be pigmented. So don't go into that nude or that brown family. Try going into those berry tones. If you're warmer skin, you can go into some more peachy tones. Give yourself the definition in the mouth. As soon as you do that again, it really warms up the entire complexion.
It's the lips and the cheeks, right. And the luminous finish of the base that can turn back the clock significantly. All right. Now let's talk about the lashes that I chose for her. There is a huge demand for a lash video. It's coming. Okay. I have it written down. I promise I'm going to do it. But I chose a lash for her. That's really cool. If you're going to an event or you want to wear these for any type of special day, or even just a normal day, whatever you want, look for this lash.
Okay. This is the Ardell Lash. It's an L-curl lash. What that means is it's specifically made for hooded eyes, more mature eyes, more often than not, have some hooding. Right? Because as we age, this part of our skin falls, as it falls on top of our eyelid. And so then we get a little bit of hugging or a deeper set look. This lash is made specifically for that. It's made for a hooded eye or a monolith. So which is like an Asian eye, and it has a curl, an L-shaped curl that completely lifts up the eye.
It is so unbelievably flattering. As soon as I put them on her, she just lit up like, Look at how happy this made her. It's so pretty as a finishing step. I wanted to open her eyes up even a tiny bit more. So we did that with a lot of tricks, right? We added that nice light tone in here. We added that nice bright concealer in here that all opened up her eyes, the L-shaped curl of those lash that opened up her eyes. But one other trick that I can show you that opens up eyes a lot is adding a white or a cream colored eyeliner to the inner waterline. So what this does is it kind of makes your eyes have the illusion of being bigger because the area around her eyes are white. Right? So if we can whiten this area, you create kind of an extended eye, like you extend the area of the eye in the mind. Right? It's an illusion and it opens up the eyes a ton. So if you struggle with small eyes, never put black on the inner waterline, put white instead, or you can do it with like a skin colored eyeliner.
That works too. But for the most dramatic effect, you can use white and it will just open them up so, so much. Again, this is how Francine looked when she came into the studio wearing her own makeup. This is how she looked with no makeup on at all. And this is how she looked after I got my hands on her.
If you guys want more mature makeup tutorials step by step, walking through it in a slower pace like this one, please give this video a thumbs up and also let me know that in the comments section below, because I would love to create more videos like this for you..